](/images/socks5.png)
A SOCKS5 proxy routes network traffic through a third-party server, masking your IP and enabling more flexible traffic tunneling. In pentesting, it’s commonly used to pivot through compromised hosts or anonymize scanning activities.
Note: I personnaly use this during an pentest engagement to make sure my traffic tunnels through an whitelisted IP address to bypass any WAF’s.
Why Use a SOCKS5 Proxy?
SOCKS5 proxies are flexible, lightweight, and unlike traditional HTTP proxies, they operate at a lower level, forwarding all types of traffic (TCP or UDP). They’re ideal for:
- Hiding your real IP during recon or exploitation
- Pivoting in internal networks
- Bypassing basic network restrictions
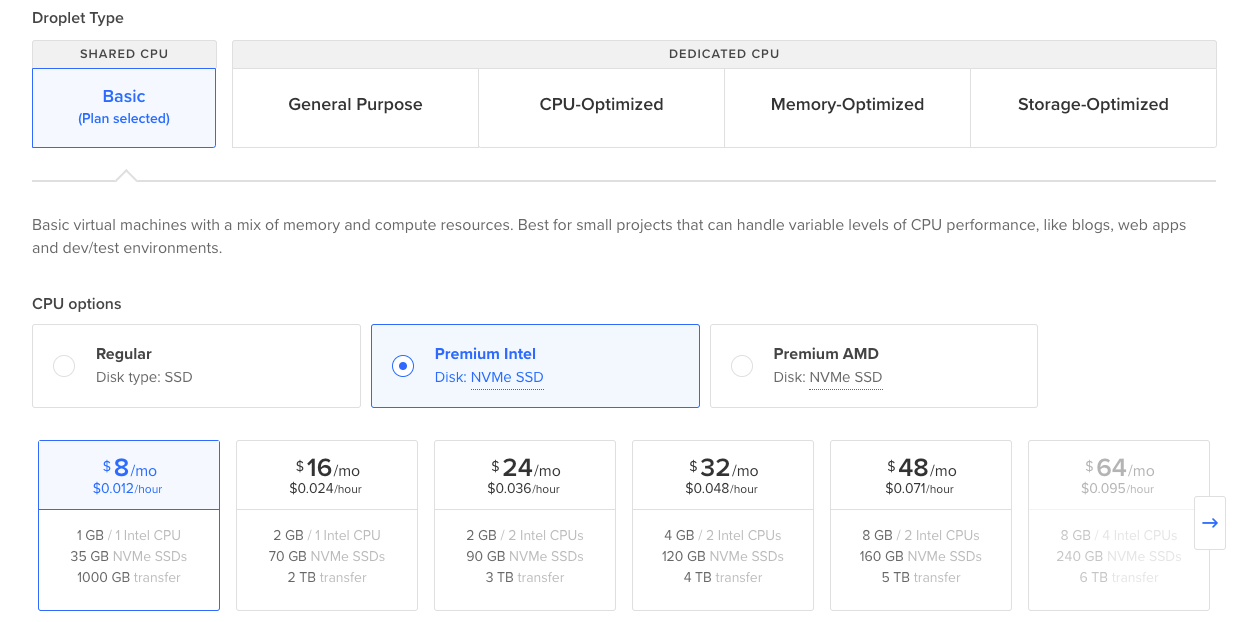
Step 1: Deploy Your DigitalOcean Droplet
- Log in to DigitalOcean
- Click “Create” > “Droplets”
- Choose the following:
- Ubuntu 22.04 LTS
- Basic Plan (512MB or 1GB RAM) is sufficient
- Choose a data center region (closer to you or the target zone)
- Authentication: Use SSH keys or password
- Click Create Droplet
Step 2: Install Dante Server
Update packages and install the Dante SOCKS5 proxy server:
sudo apt update
sudo apt install dante-server -y
Step 3: Configure the Dante Server
Edit the config file like I did
sudo nano /etc/danted.conf
This is how your config file would look like :
logoutput: /var/log/danted.log

internal: eth0 port = 1080
external: eth0

method: username none
user.notprivileged: nobody

client pass {
    from: 0.0.0.0/0 to: 0.0.0.0/0
    log: connect disconnect error
}

pass {
    from: 0.0.0.0/0 to: 0.0.0.0/0
    protocol: tcp udp
    log: connect disconnect error
}
⚠️ Replace
eth0with your actual interface (use ip a to check).
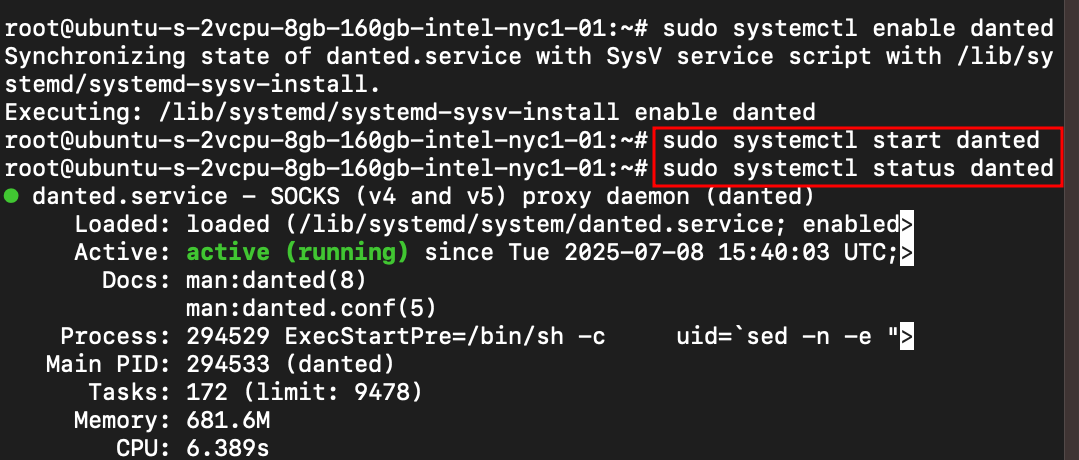
Step 4: Enable and Start the Danted Service
We’ve to make sure that it’s running without errors
sudo systemctl enable danted
sudo systemctl start danted
Let’s check the status of our service
sudo systemctl status danted
Step 5: Adjust Firewall (UFW or Cloud)
I’m allowing a port to open and communications via this port
sudo ufw allow 1080/tcp
sudo ufw reload
OR we can configure DigitalOcean’s firewall to allow port 1080
Step 6: Use SSH to Start SOCKS5 Proxy
From your local machine, connect to the droplet using SSH and start the SOCKS5 proxy.
ssh -D 1080 -q -C -N pentest@<your_droplet_ip>
Flags explained:
-D 1080: Binds a SOCKS proxy on localhost:1080-q: Quiet mode (less output)-C: Enables compression-N: No remote command; just tunnel
Step 7: Verify SOCKS5 Proxy
From your local machine, let’s test the proxy
curl --socks5-hostname <your_droplet_ip>:1080 http://ifconfig.me

You should see your droplet’s IP, not your own.
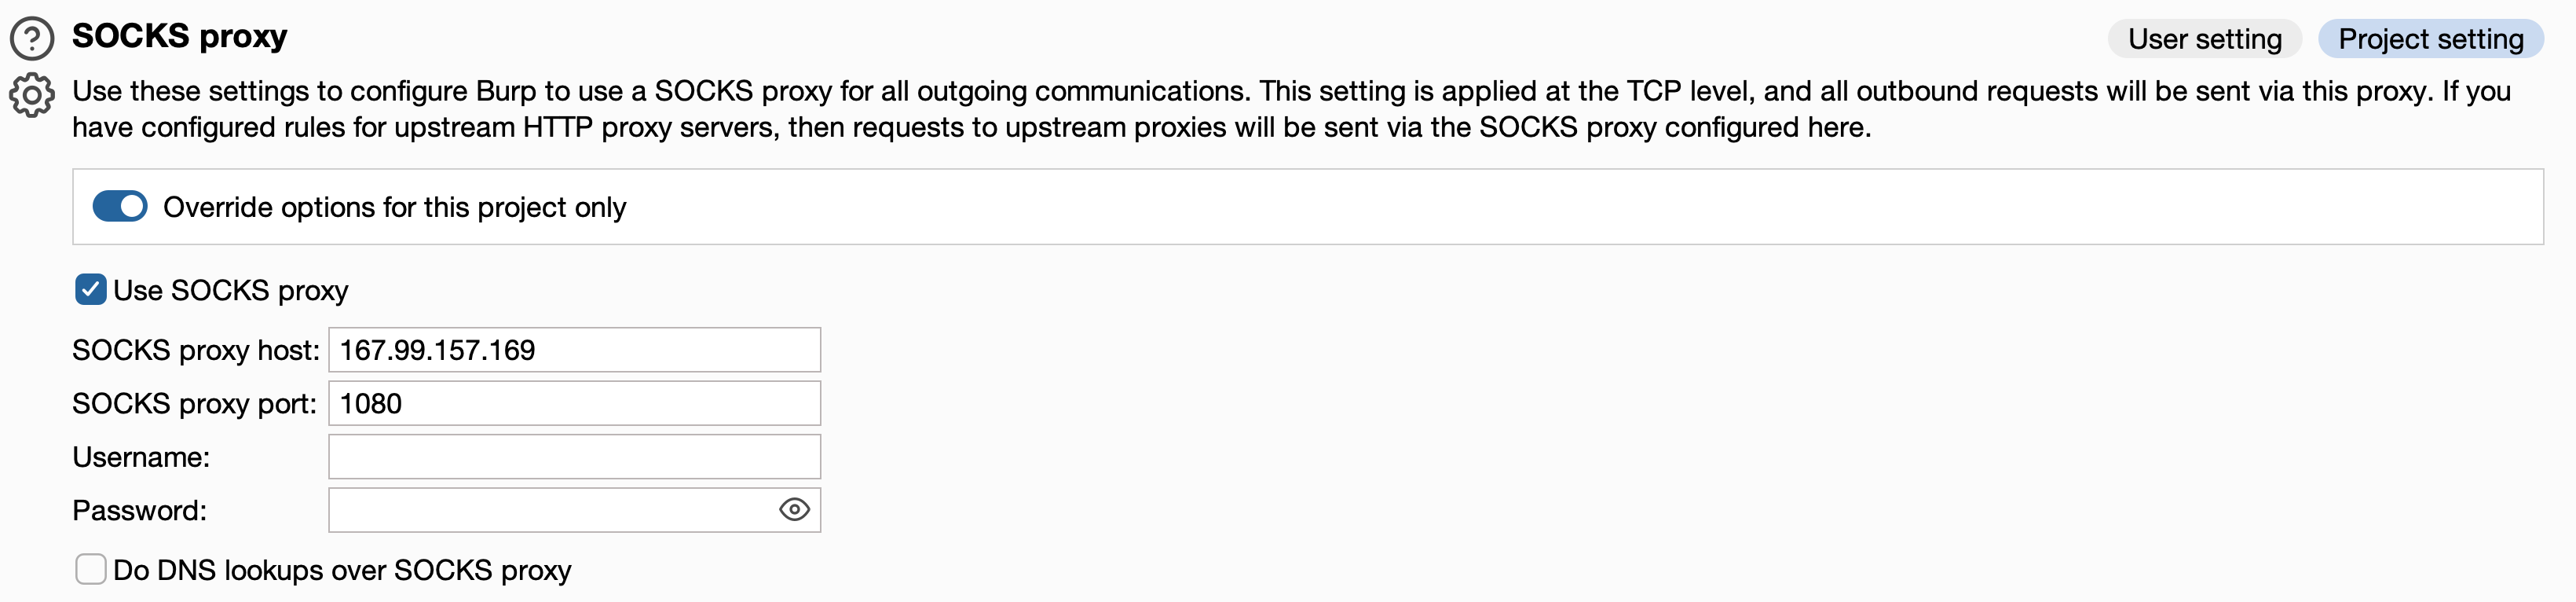
Connect via Burpsuite
Navigate to your user settings in burpsuite to enter SOCKS5 proxy details.
Conclusion
A SOCKS5 proxy gives you stealth, control, and flexibility during your pentests. With just a few commands and good hygiene (firewall, keys, user management), you’re ready to route traffic through a remote IP with ease.
⚠️ Use this only on targets you have explicit authorization to test. Unauthorized testing is illegal and unethical.